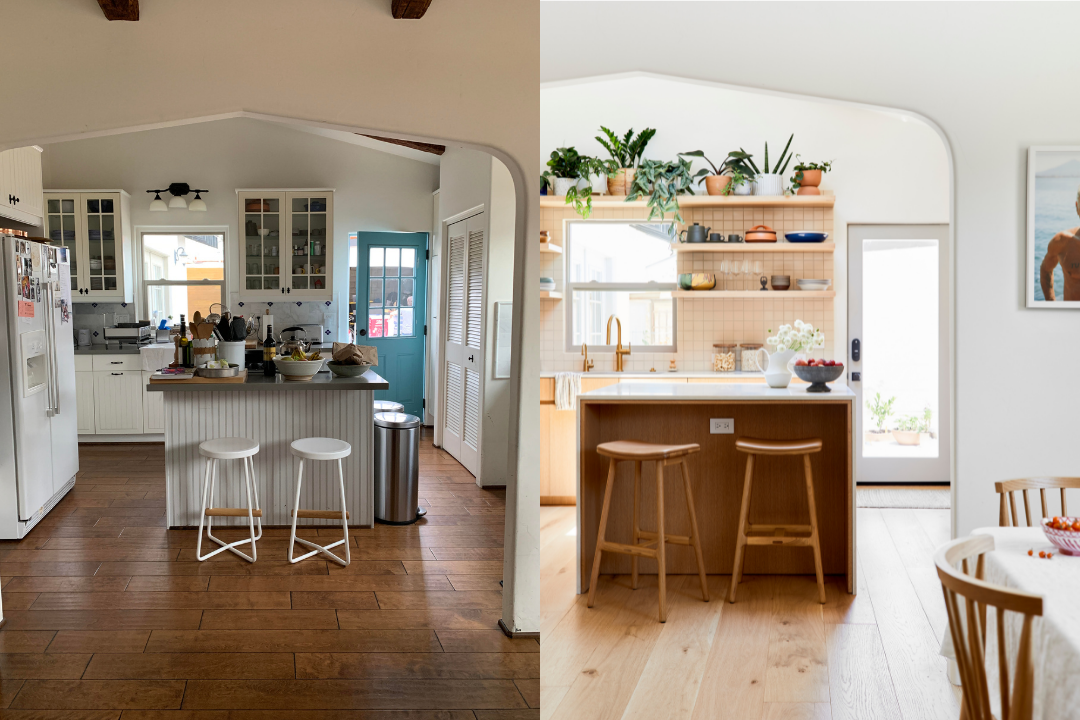
Andre and I had been talking about renovating our kitchen for years. When we bought our small Spanish bungalow in Atwater Village ten years ago, it was the open kitchen and dining room that stole our hearts. The house was a flip but, of everything we had seen for the year and a half we were house hunting, this one was by far the most tastefully redone. The kitchen was a combination of Ikea and Home Depot, with an oversized center island and open design where guests could comfortably gather. We have always loved to cook and entertain, and it seemed like the perfect fit. The kitchen was simple, with white cabinetry, a farmhouse sink, and grey countertops. The kitchen had some strange design choices, including a desk nook and a stackable washer/dryer smack in the middle of one of the walls, but we had quickly learned we couldn’t be too picky if we were ever going to get a house in Los Angeles.
You learn a lot about a kitchen once you start using it for cooking. As the years passed, Andre and I would discuss changes we would love to make to have more of a “cooks” kitchen. Wouldn’t it be amazing if we had an actual range with a vent? Can you imagine what we could do with six burners and instead of a 24″ cooktop? Our list of things we wanted to change continued to grow as the years went by and our family grew.
A year ago, we decided to take the plunge and redo our kitchen. Our house was empty for the first time as we had temporarily moved to Denver, CO, for six months. So it seemed like the best, and probably only time, we could do the work on the house we wanted to with kids.
As we discussed this dream of a renovation for years, we had a relatively clear vision of what we wanted. Our goal was a bright, spacious, functional cook’s kitchen that was kid-friendly and great for entertaining. The most important things to us were:
- Better appliances
- Increased storage
- A large pantry
- A home espresso machine setup
- Beautiful, natural light for shooting content
- A better flow for moving around the space when cooking
We had an architect’s assistant prepare drawings for us based on our mood boards. We also partnered with some incredible brands that helped bring the kitchen to life on a budget. Andre dealt with most of the renovation, managing the project himself rather than hiring a GC or project manager. Ultimately, this was extremely hard on him (people aren’t lying when they say that renovating is one of the gnarliest things to get through), and he will share some of the big lessons he learned in a later post!
Here is some more detail about the brand partners we worked with and the significant changes we made.
Appliances: Considering price and performance, we decided to go with Thermador as their appliances are solid performers with a good reputation among cooks. We chose their Pro Harmony line as it is clean and modern without looking too high-tech. At the time of purchase, the distributor we were dealing with had a promo running, so we got a free dishwater and rangehood with our refrigerator and range purchase.
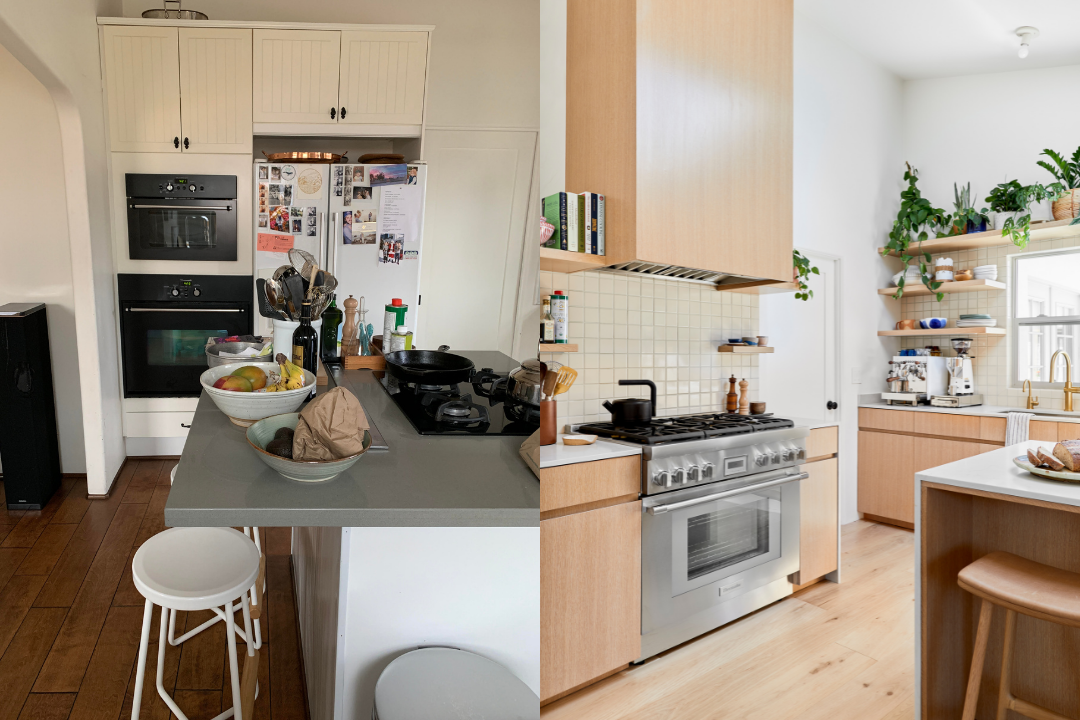
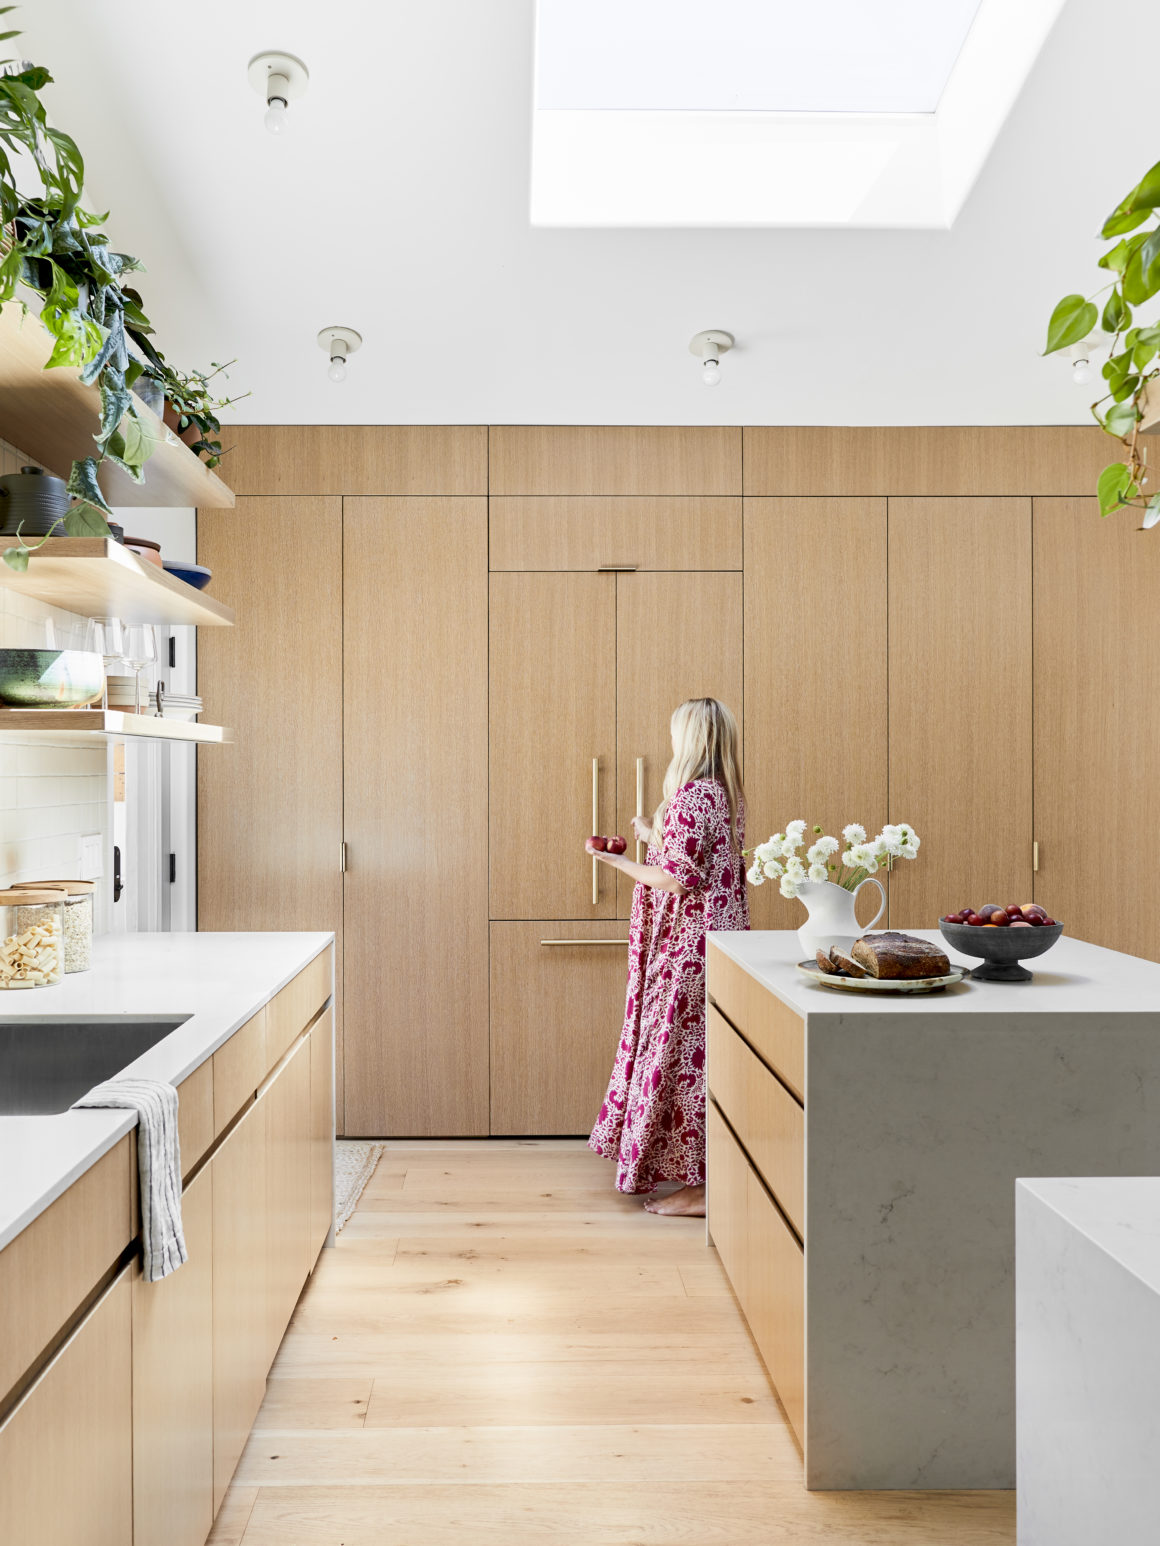
Storage: To increase overall storage, we decided to dedicate one entire wall in the kitchen to the pantry, fridge, and shelving for cookware, ceramics, dinnerware, serving pieces, etc. We decided to install floor-to-ceiling custom cabinetry and a built-in fridge to get the most storage and shelf space while keeping as much as possible out of sight. We opted for custom cabinetry from AT Designs and used GL Veneer’s Premium Rift Cut White Oak veneers for all the cabinetry faces and Emtek hardware for all the finishes. The neutral tones of the veneers bring a lot of soft warmth into the space. We tripled the amount of storage we originally had in the room by adding floor-to-ceiling cabinetry. In addition, rather than having cooking appliances on the countertops, like our Kitchen Aid Mixer or Vitamix, we can now store these items out of sight and bring them out as needed.
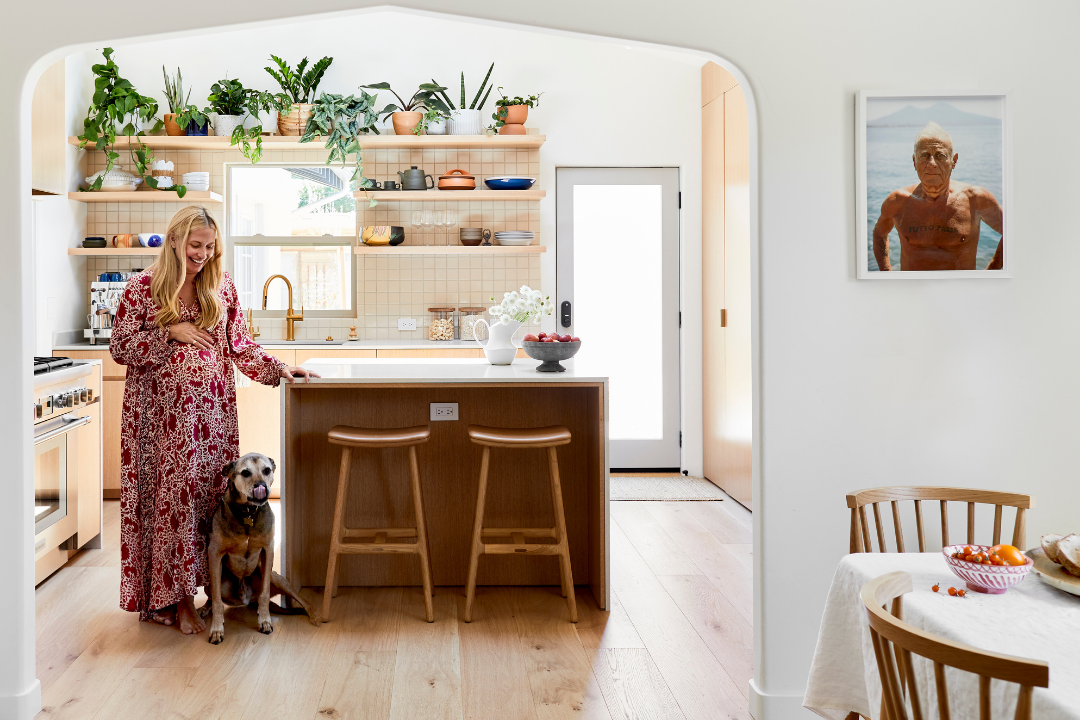
Space: After years of cooking in our kitchen, we knew we needed more room to move around while still maintaining the island for counter space. The island has always been important for cooking and entertaining as it is where everyone gathers. Our kids and friends always love to spend time in the kitchen with us when cooking, so we wanted to create a place for them to sit and connect with us. We chose Article Esse Stools in White Oak with a leather seat for the island seating. They are comfortable and durable, while the beautiful white oak color and leather complements the kitchen’s neutral tones nicely.
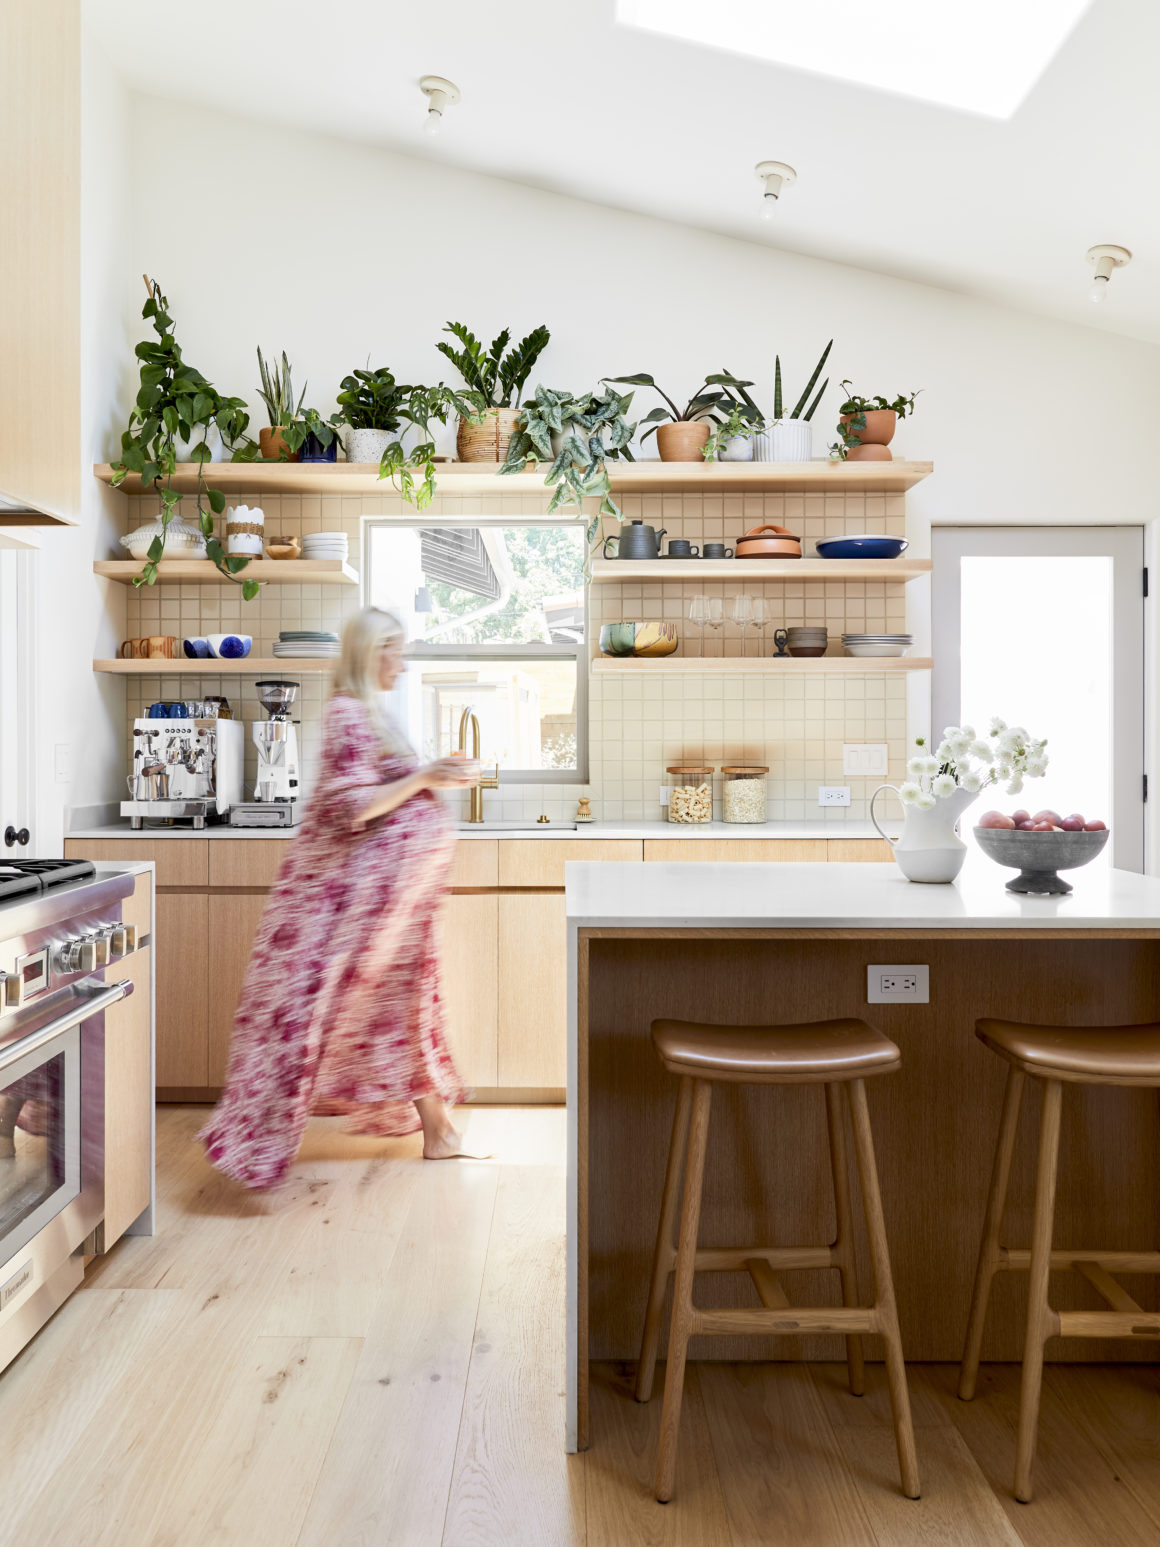
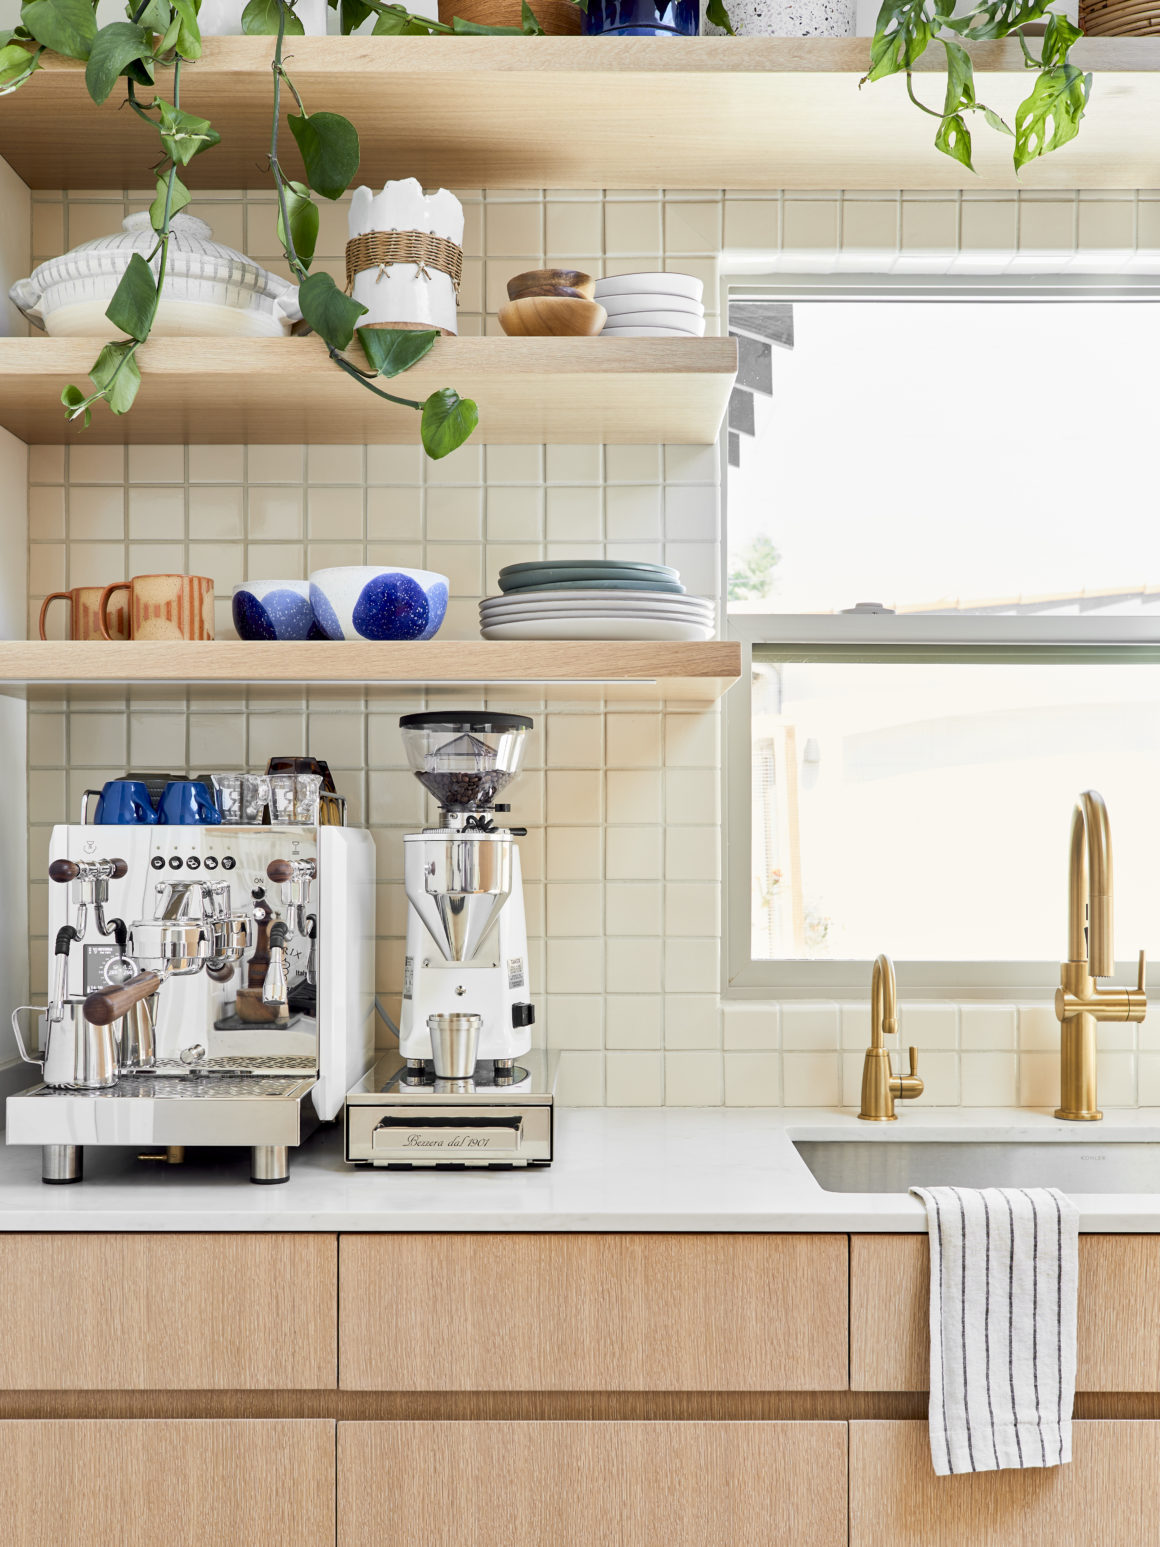
For the countertops, we chose Caesarstone in London Grey. We went with this vendor because of product performance, price, and quality. It’s less prone to staining and easier to clean and maintain than more porous natural stone such as marble. The London grey color has cool tones that compliment the warmer tones of the GL White Oak Veneers and the handmade FireClay Tiles in Milky Way we used for the backsplash and shelf wall. We loved the contrast between the subtle texture of the handmade tiles and the smooth quality of the countertops. We also brought in the most beautiful indoor plants from Folia Collective as an added touch on the floating shelves, and by having them line the top shelf, our countertops and island still have a lot of usable space.
Home Espresso Machine Setup: As two tired parents, Andre and I have always viewed our morning coffee as essential to our sanity. After years of spending a lot of money each month getting coffee at a café, we decided it was time to get a home espresso machine. We partnered with Pasquini Coffee Co. to make our coffee dreams come true. They set us up with a beautiful Bezzera Duo De machine and a Mazzer Mini Electronic A grinder. We had the machine panels custom powder coated white and selected the grinder in white to compliment the tones in the kitchen.
Light and Lighting: With all the cooking and recipe content I share daily, we knew having beautiful, natural light was essential for the new kitchen. We were so excited to partner with Velux to add a solar-paneled skylight right above the island. It brings beautiful natural light (and fresh air) into the kitchen throughout the day, along with touches of blue skies. It also opens, which helps air circulation if it gets hot or smokey when cooking. As for lighting, we chose Cedar and Moss Swift surface lights for the ceiling, and RBW Dimple Flush Mounts as sconces on each side of the archway for accent. We added LED strip lighting under all of the lower floating shelves, which has turned out to be a beneficial detail when cooking at night. Also, switching out the dark engineered flooring in our entire house for a lighter engineered wood floor from National Hardwood, #304 VAND, made all the difference in how bright and light everything now feels.
Sink and Faucet: We knew we wanted a wider and more durable sink with all the cooking and dishwashing we do. Koehlers’ Strive stainless steel sink was the perfect fit. For the faucet, we chose their Crue Kitchen Faucet in brushed brass as a nice compliment to the Emtek brass pulls throughout the kitchen.
Even though I know Andre has major PTSD from the renovation, it is a dream come true to cook and spend time in a space we designed. A huge thank you to all of the brand partners that made this dream a reality. We couldn’t have done it without you!
Flooring: National Hardwood Flooring and Moulding
Skylight: Velux
Tiles: FireClay Tile
Countertops: Caesarstone
Wood Veneers: GL Veneer
Custom Cabinetry: AT DESIGNS
Appliances: Thermador
Cabinetry Hardware: Emtek
Faucet and Sink: Kohler
Lighting: Cedar and Moss and RBW Dimple Flush Mounts
Furniture (Bar Stools): Article
Coffee Machine Set Up: Pasquini Coffee Company
Indoor Plants: Folia Collective
Photography: Sara Tramp